Absolute Electronics Services is the source for all your high-quality PCB assembly needs! Since 1995, we have been providing high quality PCB assembly services to numerous companies in a broad spectrum of industries, from consumer electronics to telecommunications, LED lighting, medical, automotive and more.
The quality of a PCBA is already largely determined by design. You then put everything you can foresee on paper. In addition, the quality of the bare PCB and the production process has a major influence on the final quality of the PCBA.
Factors Affecting PCBA Quality
Specifications
It is important to have clarity in the PCB specification about critical high-frequency parts. It is therefore wise to reserve enough time for this when designing. Click here to visit electronic manufacturing services.
Structure
The construction of the bare PCB is essential to the quality of the PCBA. A clear structure of the PCB layers, layer thicknesses, and prepreg material type and thicknesses are an important part of this.
Fiducial markers
It is very important to leave space for fiducial markers in any design. Place it not symmetrically and as far as possible in at least two corners. This allows assembly machines to place the components very precisely.
Display components that lie on the edge of the PCB as clean as possible. Ideally at least 3 mm from the edge. Think of connectors that protrude over the edge. We take this into account when penalizing a PCB.
Would you like to know how to guarantee the highest possible quality? View our design rules.
Good design is half the battle
A good producer thinks along with its customer. The first step is an extensive intake with the client. The producer records the most important points and PCB specifications to send to the PCB board assembly supplier. Based on this information you will receive a good price and the expected delivery time.
Ready?
Before the actual production starts, we check the PCB for the data processed by the printing factory. This is to ensure that we fulfill important matters and thus receive a first time right PCB. In addition, we place a date code and product code on each PCB or panel edge, so that we can immediately reset the production programs in case of problems.
Purchase production of PCBAs from Absolute PCB
We have over 30 years of PCB assembling experience. From unique copies to batches of 100,000 copies. Our production department consists of fully automatic pick and place machines. These machines together have a capacity of more than 45,000 components per hour. Thanks to this capacity, we can offer a fast delivery time at an attractive price.
The right devices to choose , you can do a lot to save energy . Do the rounds at your home and see which devices need to be replaced !
Cooling and freezing
It’s no secret that refrigerators and freezers are one of the biggest power guzzlers in the house. Therefore choose appliances with an A +++ label , which are up to 60% more economical . Try also to your refrigerator and freezer as little as possible to open , because the device must additional energy supply to cool back down .
Refrigerator
The ideal temperature of your refrigerator is 4 to 6 ° C , each degree lower means 5% extra consumption . Do not clutter your refrigerator , because the more it contains , the more it consumes . Do not put hot dishes directly in the refrigerator, but let them cool down first . Hot dishes cause the temperature in the refrigerator to rise . This not only uses more energy , but also increases the chance of bacteria . Frozen products are allowed againdefrost in the refrigerator as this helps to keep the refrigerator cool . Avoid useless energy and turn the refrigerator off when two weeks or longer journey goes.
Freezer
The ideal temperature of your freezer is -18 ° C , each degree lower means 5% extra consumption . Also defrost your freezer regularly (at least once a year) because ice builds up more energy. Unlike a refrigerator , an empty freezer consumes more than a full one , because the air in the free space must also be cooled . Therefore, fill in the empty space , for example with styrofoam .
Washing and drying
Along with refrigerators and freezers, washing machines and tumble dryers are one of the main energy consumers in any household. Keep this in mind when purchasing your device and choose machines with an A +++ label , which consume up to five times less electricity. The most energy goes to heating the water , was therefore as much as possible at lower temperatures . Benefit as much as possible from the cheaper night and weekend rates . You do not have to get out of your bed for this, most devices nowadays have a “ delayed start”-function.
Washing machine
With the current washing machines you can wash well at 30 degrees . So only wash at higher temperatures if you really need to, for example if your clothes are full of stains . Always wait until you have a full machine , so you do not consume useless energy. If you make sure that the washing machine is already drying the laundry properly , you no longer need a dryer or at least use less energy .
Lighting
Led lamps
Classic light bulbs are not only anything but energy efficient , they are also not efficient at all , as 95% of the energy they use is converted into heat and only 5% into light . LED lamps can be a bigger part of converting electricity into light Box Build Assembly, making them less electricity consumption for the same amount of light produce. LED lamps are more expensive to purchase, but thanks to their lower energy consumption and longer lifespan you will earn that back in the long run . Choose a lamp with energy label A , they are the most economical. Of course, even with lamps that are energy-efficient, you should not leave the light on unnecessarily . To fully respect this rule, you can install a motion detector that only lights up when you enter a room and goes out when you leave the room.
Relaxation
TV
When it comes to a TV’s power consumption, there are two things to consider. On the one hand the type of screen ; plasma screens consume a lot , lcd led screens average and oled screens are the most economical . If your device is five years or older , there is a good chance that it will have a plasma screen , so it is best to replace it . On the other hand, the logical reasoning applies, the larger the TV is, the less economical .
Do the dishes
Dishwasher
The use cost of a dishwasher weighs more heavily than purchase price . So don’t be stingy when you’re in the store. Do not run the machine when it is half full , two half full turns consume much more than one full. Make use of the eco program , this takes longer but you use 30% less electricity and a quarter less water ! Thanks to the start delay function that most dishwashers have, you can easily take advantage of the nightly rate . Even a well-maintainedmachine is more economical, so clean the filter regularly by rinsing it under running water. Remember, although a dishwasher is an energy consumer, it still uses less water than washing by hand !
You no longer have to remain on standby
In addition to the correct choice of device , there are a number of simple things that you can pay attention to to save energy. Did you know that 10% of the electricity consumption in the home is sneak consumption ? That is energy consumption caused by devices that are not completely turned off . This concerns, for example, time indications on decoders , TVs and modems that are in standby . A printer , hairdryer or kettle you only need it for a moment , but the plug often remains in the socket all day and so the device consumes energy, even if it is only a small amount. Also chargers for mobile phones and laptops gives you the best from the wall outlet when you do not use anymore. If you do not want to unplug all appliances separately, use a multiple plug with an on / off switch .
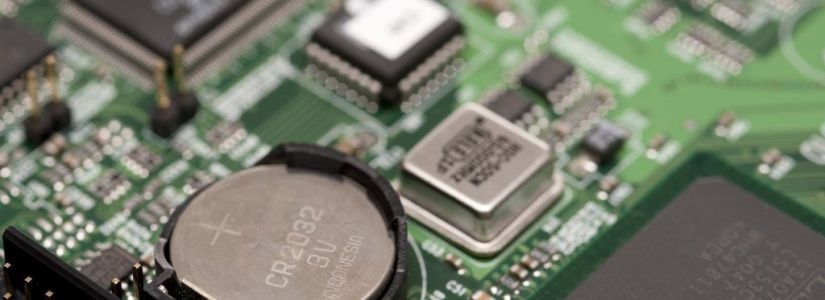
Did you know that your computer or laptop also contains batteries? That may seem unnecessary because the computer / laptop can be connected to the mains. Nevertheless, it is necessary to ensure that the computer can continue to function properly. When this is off, the so-called BIOS settings must be maintained. These are things like date and time, but also settings that are necessary for the computer to function properly. The motherboard has a button cell battery for this. Hardly any energy is required to maintain the so-called BIOS data when the computer is turned off. Still, it is quite possible that the battery will be empty after a few years. In that case your computer will still work, but the BIOS settings will no longer be remembered. As a result, the computer slows down and the date and time are often no longer correct. Fortunately, the Bios motherboard battery can be easily replaced.
Bios motherboard battery replacement: do it yourself or bring it away?
When the motherboard battery needs to be replaced, you will notice that the computer slows down. Also, date and time are no longer remembered properly. With some computers you even get an automatic notification that the battery of the motherboard needs to be replaced. You can choose to do this yourself or have it done by an expert. The latter is of course a lot more expensive but also simpler. The computer is a complicated device and if you just try something, there is a good chance that you will cause damage. However, you do not necessarily have to have the Bios motherboard battery replaced by an expert. If you approach it correctly and step by step, it is also very good to do it yourself. It is wise to realize what you are doing and not just try something.
Keep the computer clean
If you want to replace the motherboard battery then contact to pcb assembly services in california, you must of course unscrew the computer. In any case, it is wise to handle this very carefully. The inside of a computer can be very sensitive to dust or dirt. It can even cause damage. The same applies to your hands and fingers, which can also contain dirt. In addition, it is recommended not to touch the new motherboard battery for too long. The acid from our fingers can drain the battery a lot faster and you obviously do not want to have to replace the battery a year later. It is perhaps even better to put on gloves. In addition, latex gloves may be the best option because you still have enough grip to hold and install the battery.
Replace bios motherboard battery yourself
Purchase a 3 volt Lithium button cell battery, preferably a CR2032 or CR2025
Turn off the computer or laptop completely and unplug the power cord.
To make sure you are not statically charged. This can be done, for example, by briefly touching the heater with both hands.
Unscrew the computer cover or the bottom of the laptop. In some cases, special mini screwdrivers are needed for this.
The motherboard is the square green plate. You will probably notice it immediately. Locate the CMOS battery on the motherboard.
Press the battery tab outward to remove the old battery from the system board.
Carefully insert the new battery in the same place. Make sure that the + side is facing up.
Close the computer or laptop and reconnect it to the mains.
Ready! Sometimes it is still necessary to adjust the BIOS and time settings. Usually, however, computers and laptops do this automatically.
Computer problems vary in severity and frequency of occurrence. Some, such as the old startup problems, will occasionally need complex solutions to solve. Other problems, including problems that cause the PC to jam on the motherboard, may not necessarily require such fixations.
Anyway, we always recommend that you start with the simplest idea that you can come up with and only continue with alternative ‘harder’ solutions when all your smart ideas come out.
The purpose of this article is now to show you how to solve the problem with your PC getting stuck on the motherboard screen and starting your computer.
As I hinted before, the glitch will initially seem scary, but you will be surprised that it requires a fairly simplistic approach to overcoming it.
First, let’s look at the possible triggers of this error …
Causes of the PC fixed on the motherboard screen problem
The kink in the cable can arise for various reasons:
System RAM : Poor memory (possibly due to overclocking or overvoltage) can cause this failure on your computer. You might also encounter the annoying glitch if one of your memory slots is defective.
Wrong boot configuration: For example, if you change the initial boot configuration, using the MSCONFIG utility can cause this type of problem.
Corrupt BIOS : If for some reason your motherboard ‘s BIOS has been damaged, you can be sure of many challenges during startup, such as this PC that is stuck on the motherboard problem. For example, it is known that a failed BIOS update introduces this stubborn issue.
Overall, PC problems can arise from some very strange events – some very small – so these are just a highlight.
What to do if your PC crashes on the motherboard screen
What should you do if your PC holds onto its BIOS start screen when it starts up? Here are some proven solutions.
Solution 1: restart the PC
Simple, but works from time to time. You see that your PC may encounter small and very temporary BIOS reading errors, so restarting will help you reload the correct settings and successfully launch them.
Safe mode helps in remedying countless malfunctions from slow startup sources to startup failures and everything in between. Try it.
To step:
Shut down your PC manually (forced) about three times in a row. The Choose an option screen . Click Troubleshooting.
Select advanced options.
From there, choose Startup Settings
Hit Restart .
After your PC has restarted, you will see a large number of choices. Select 4 / F4 to start it in safe mode.
When it starts up, perform the system recovery to restore your computer settings to a previously working state.
Solution 3: check your startup sequence
If you have changed the boot order, your PC will have trouble finding out where to boot, so you have to straighten up your boot order.
To step:
Start your PC and install the BIOS (press the correct key at start-up, for example ESC, F9, F2, etc.).
Locate the boot sequence area and check if your hard drive is set as the first boot device.
Restart your PC.
You will also experience the same problem if you have connected an external gadget, such as an iPod. So make sure that you do not have external storage devices such as a USB hard disk connected.
Solution 4: check the RAM
We have already seen that system memory (RAM) is a frequent source of such errors. To restore, limit the RAM and inspect the installed RAM modules plus their slots.
To step:
Open your system unit.
Locate the RAMs and:
Remove the RAMs one by one (if applicable).
You then reinsert the RAMs (again one by one) while you try to boot each time. If the device starts without one (or more) RAMs, know that the problem is with the memories. You must of course replace the suspicious RAM module (s).
Solution 5: delete the CMOS (BIOS)
If you drain the CMOS battery on your motherboard, your BIOS settings are normally reset to the factory settings.
This shows existing misconfigurations and damage that paves the way for the PC to boot.
To step:
Turn off any peripheral device connected to the computer.
Disconnect the system power cord from the AC power source.
Remove the computer case cover.
Locate the CMOS battery on the motherboard. The battery is usually located in a horizontal / vertical battery holder, although it can also be connected to an installed onboard header with a wire.
Remove the CMOS battery. Note the + and – orientation if the CMOS battery is in a holder. Finally, carefully pry off your battery from the connector. For batteries connected with a wire to the built-in head, simply disconnect the wire.
Wait for 1-5 minutes.
Reinstall the battery.
Replace the computer case.
Reconnect all devices plus the computer.
Turn on the computer.
Keep in mind that this method is general and that your machine may require slightly different steps, so consult your computer manual or the manufacturer’s website if you are unsure.
Sometimes you also need a screwdriver to press on the tab (on the edge) of the battery holder
All in all, this solution works like a charm in most cases.
Solution 6: perform a new installation
In extreme cases, the only way out is to reinstall the suspicious configurations. You may need to reinstall Windows, a completely new hard drive, or even a new motherboard.
However, this should be the last case if everything else will not remove the PC in case of a challenge on the motherboard screen.
The printed circuit board of the print must be vacuum packed with a colorless gas ballet plastic bag and the desiccant must be attached to the vacuum bag to ensure tight packaging. Cannot come into contact with air and water to avoid the surface of the circuit board. Immersion gold, aerosol and paddles are oxidized and influence welding, is not conducive to production.
For PCB PCBs that are not used for a long time, it is best to apply a coat of three anti-paints. The effect of the three anti-paints can prevent moisture, dust and oxidation. This extends the shelf life of the printed circuit board to 9 months.
3. Rapid PCB prototyping in Illinois packaging requires a layer of bubble film on the edge of the box, the water absorption of the bubble film is better so that it can play a role in water absorption and moisture. In addition, moisture-resistant beads cannot be less.
4. the PCB circuit board labeled according to the classification of emissions. After sealing, the box must be distributed, stored in a dry and ventilated place away from the ground, but also to prevent sunlight.
5. The storage temperature of the PCB circuit board is preferably controlled at 23 ± 3 ° C and 55 ± 10% RH. Under such conditions, surface treated circuit board plates such as gold, electric gold, spray tin and silvering can generally be stored. Surface treated PCBs such as Shenyin, Shenxi and OSP can generally be stored for 3 months for 6 months.
In fact, the PCB circuit board is stored for a long time. It is related to the surface treatment. The gold and galvanic gold are the longest in rapid PCB prototyping in Illinois. They can be stored for two or three years under constant temperature and humidity conditions. Doing well PCB PCB storage to better extend the life of the PCB cannot be ignored.
Horizontal and vertical design If you screw up some cheap Chinese electronic stuff, you will usually find a print in it, on which the parts are soldered in the manner shown in the figure below on the left. It will undoubtedly work, but such an end result is not exactly something you can be proud of. If you love your hobby, then make sure that all parts are in a nice horizontal and vertical grid. It takes a little more puzzle when designing the print, but do you prefer a print as suggested on the right?
Polarized components Polarized components are components that have a plus and a minus connection, such as diodes and electrolytic capacitors. You can include these components on the print as it suits you, but you can also make the effort to design the print in such a way that the positive connections of all capacitors and the cathodes of all diodes are directed towards the top and the right side of the print, for example. You can also ensure that all ICs are placed in the same way, so with pins 1 and 14 or 1 and 8 facing up.
Heavy parts Sometimes you have to include heavy parts in circuit boards, such as transformers or large capacitors, on your print. Never rely on soldering islands as the only mechanical fixation for such parts. If you accidentally drop the device, there is a good chance that the transformer or heavy elco will be torn from the soldering islands. We know it: in the past, print transformers had at least two flanges, which made it possible to screw the transformer onto the print with two or four M3 bolts.
Modern print transformers no longer have such flanges: after all, that costs a little more material and a more complex mold for the housing, and in tough global competition, those few extra cents can make the difference between selling or dumping. If you do not see the possibility to attach a print transformer to the PCB with at least two screws, at least use glue under the transformer body to mechanically connect the component to the printed circuit board. You can either glue heavy ELCs to the print or fix them to the print with a tie-wrap.
PCB mounting of switches and potentiometers If you include switches and rotary potentiometers directly on the PCB assembly, you have the problem of giving these components the necessary mechanical stability. In the figure below we have suggested how you should and should not do it. Design solder islands that are as large as possible around the three pins of the potentiometer and make the three copper tracks that feed in and out the signals as wide as possible. Remember that the copper layer is glued to the base material and that the adhesion of the copper to the base material increases as the contact surface between print and copper is larger. The left potentiometer will, after you have turned it a hundred times.
Good and bad print design practices Finally, we provide a number of examples of good and bad print design practices. Most examples seem obvious, but you should pay attention to how often these basic rules are violated during a pcb assembly.
/image%2F6136577%2F20201031%2Fob_3f7bbb_4.png)